Also called German Twisted Cast On, this method is based on the Long Tail Cast On and is a great stretchy cast on to have in your repertoire. This is my favourite cast on for cuff down socks.
English-style knitters may find the Thumb Cast On method easier, while Continental knitters may prefer the Slingshot Method, both described below.
You need one needle and a long tail to create this cast on, using either method.
Slingshot Method
The Setup
The setup is identical to the Long Tail Cast On.
Step 1: Measure out a long tail, about four times the circumference of your sock, plus about 6″ / 15 cm.
Step 2: Hold needle in right hand and hang yarn over the needle with the long tail strand in front of needle and the working yarn (attached to the ball) in back of needle. Hold st on needle with forefinger. A slip knot may be used to hold yarn on needle, but I prefer to minimize the use of knots in my knitting. This strand (or slip knot) is the first cast-on stitch.
Step 3: Pinch thumb and forefinger on left hand together and insert them between the dangling strands.
Step 4: Grasp both strands with the remaining three fingers of left hand, holding them in your fist.
Step 5: Open up thumb and forefinger to “part the curtains.”
Step 6: Bend left wrist so palm faces up. The yarn should be in a V-shape with the needle at the point of the V, the tail looped around the thumb, and the yarn leading to the ball looped around the forefinger.
The Cast On
Step 1: Move needle underneath both strands of thumb loop yarn and away from yourself.
Lift needle tip high enough so it can then dive down into the centre of thumb loop (between the strands), scoop towards yourself underneath front thumb strand,
and then point needle upwards. The loop of yarn around the thumb should now have a twist in it.
Step 2: Move needle behind near strand on forefinger from right to left.
Step 3: Curl thumb towards centre of fist to untwist the loop on the thumb. Dip needle down into thumb loop and out towards yourself.
Step 4: Without letting go of the yarn in your fingers, let the thumb loop slip off the thumb
and reposition yarn around thumb by moving thumb behind the strand from left to right.
Spread out thumb to tighten the slack around the base of the st, returning to beginning position.
Repeat Steps 1 to 4 until the required number of sts have been cast on. Scroll to bottom to see completed cast on.
Thumb Cast On Method
Follow Steps 1 and 2 from Slingshot Method.
Step 3: Hold tail in left fist with palm facing downwards and yarn below thumb.
Step 4: “Thumbs down”: Point thumb down behind yarn.
Step 5: “Thumbs up”: Point thumb up creating a loop around thumb.
Step 6: Move needle underneath both strands of thumb loop yarn from front to back. Lift needle upright …
… and then dive down into the centre of thumb loop (between the strands), scoop towards yourself underneath front thumb strand, …
… and then point needle upwards. The loop of yarn around the thumb should now have a twist in it.
Step 7: Holding yarn with right hand in your usual manner, wrap yarn around needle.
Step 8: Curl left thumb toward centre of fist to open up the loop on the thumb … … then dip needle down into thumb loop and out towards yourself.
Step 9: Maintaining hold in fist, drop loop off of thumb and gently pull on tail yarn to tighten slack at base of the new st.
Repeat Steps 4 to 9 until the required number of sts have been cast on, counting the slip knot as the first st.
The Completed Cast On
Right side of Stocking Stitch swatch featuring Old Norwegian Cast On where the tail yarn part of the cast on is worked in pink yarn.
Right side of 1 x 1 Rib swatch featuring Old Norwegian Cast On.


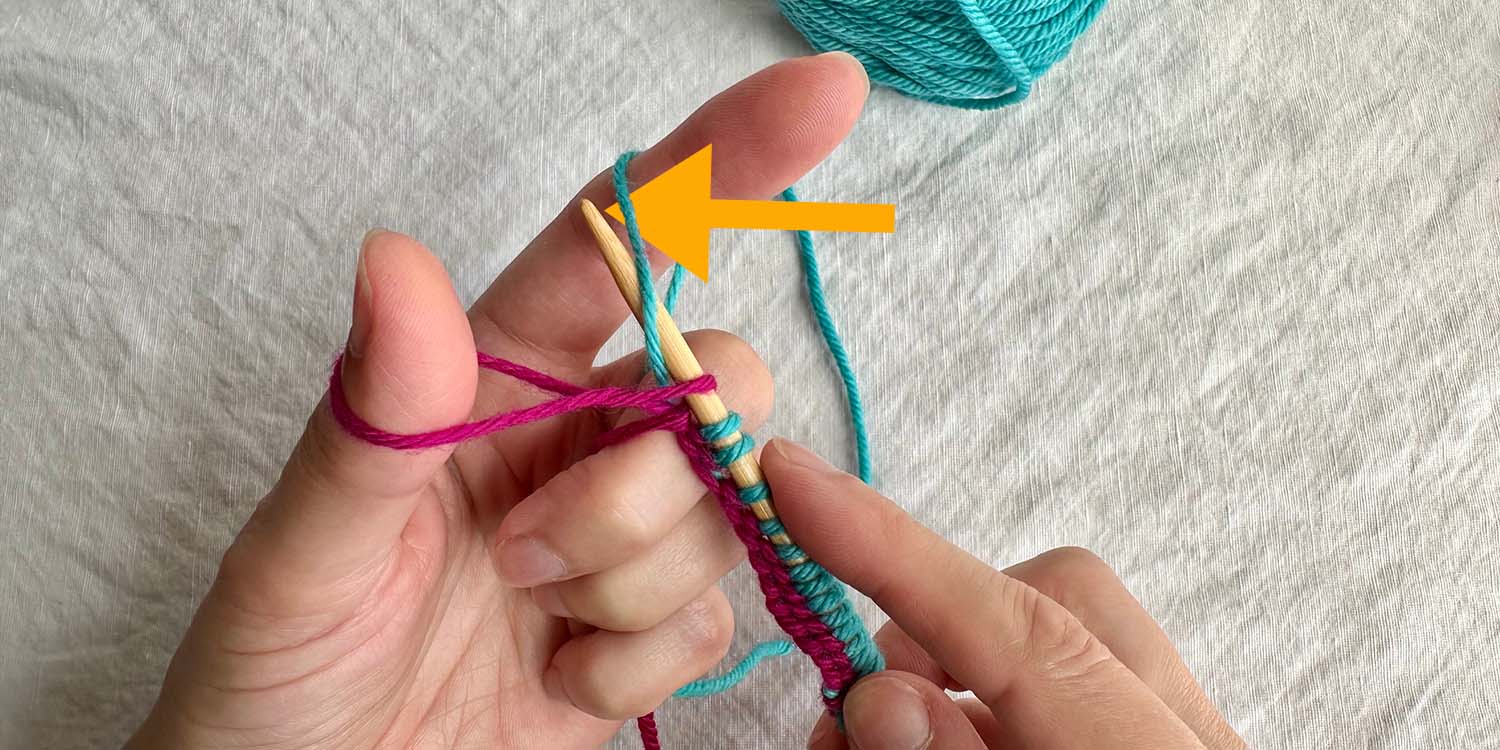 Step 2: Move needle behind near strand on forefinger from right to left.


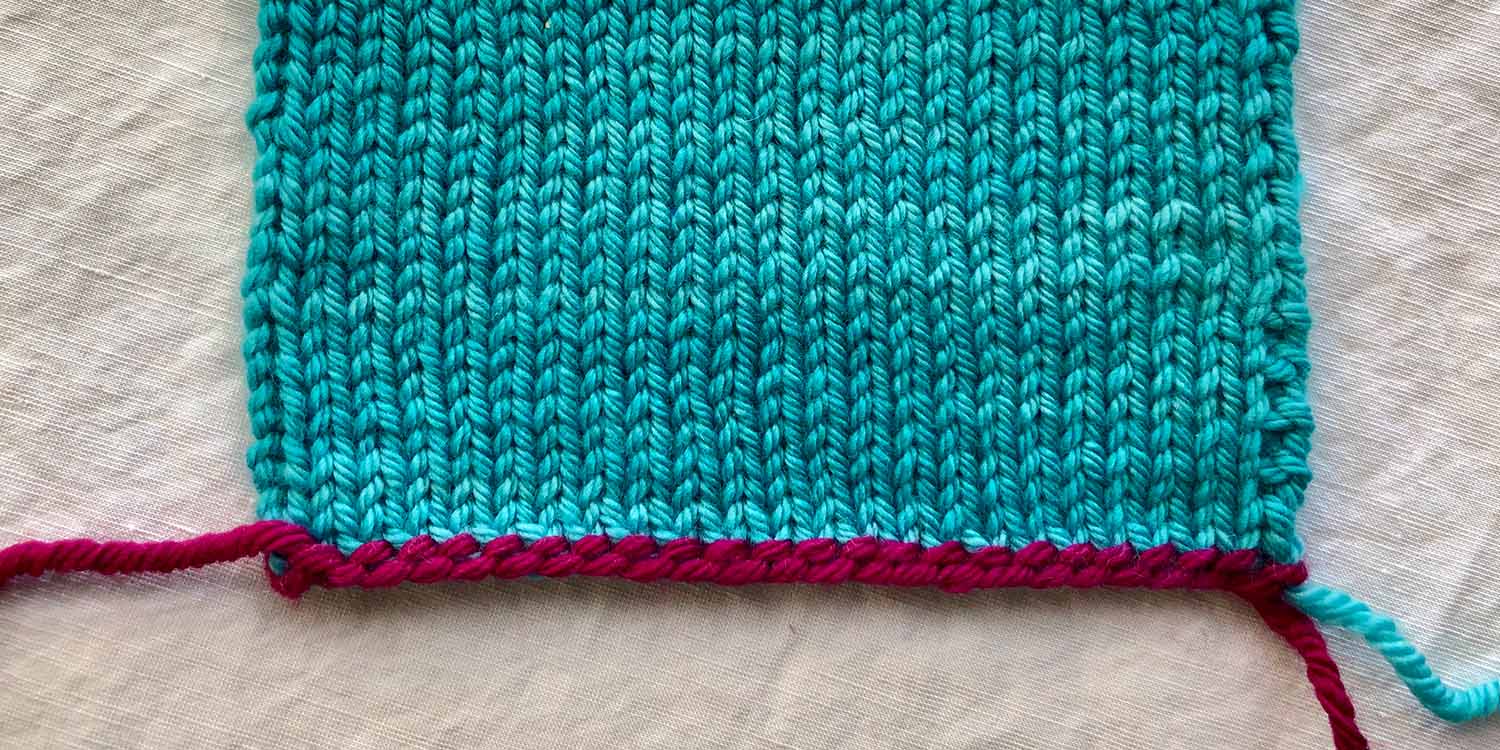 Right side of Stocking Stitch swatch featuring Old Norwegian Cast On where the tail yarn part of the cast on is worked in pink yarn.
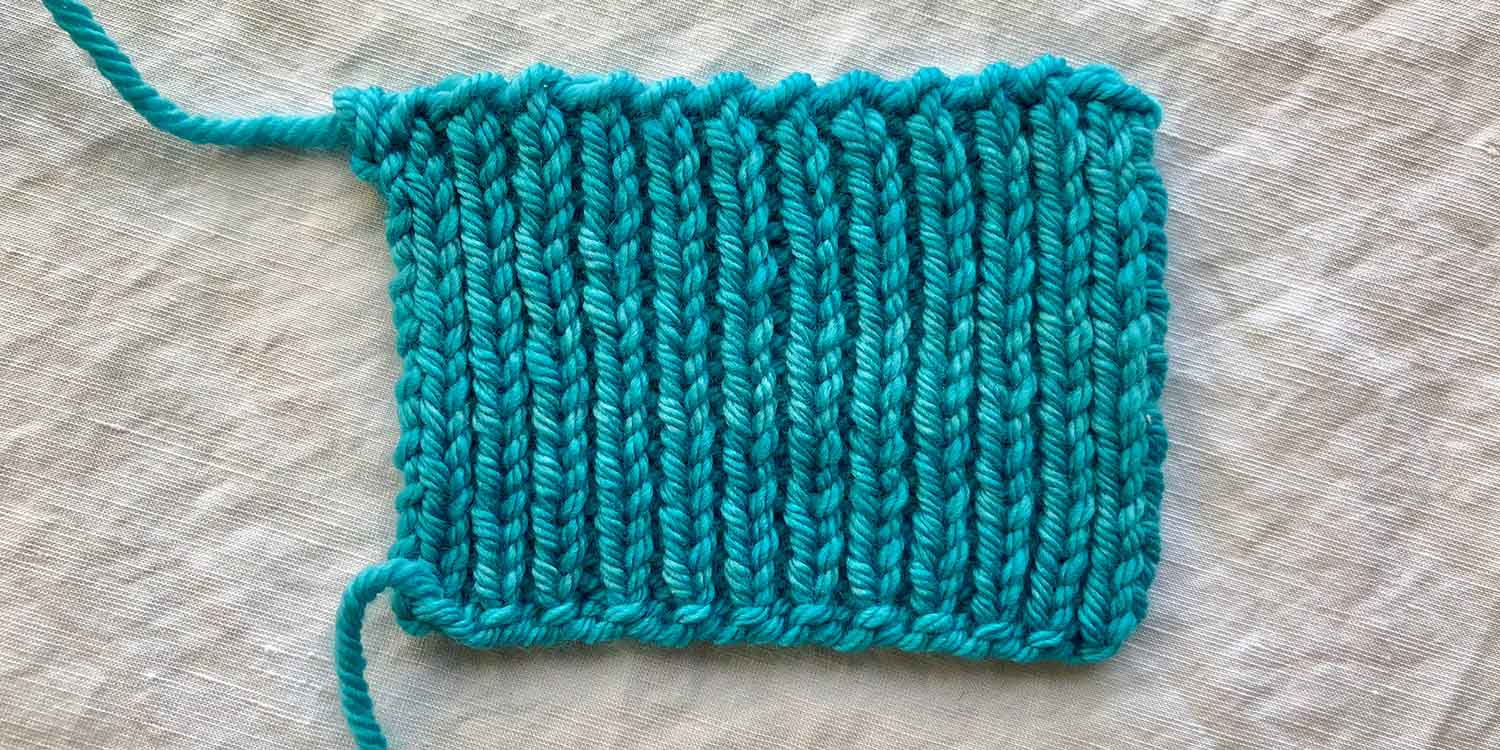 Right side of 1 x 1 Rib swatch featuring Old Norwegian Cast On.


