Double Needle Cast On

A cast on just worked on two needles (one larger, one smaller), sitting on top of a grey yarn cake, sitting on an iPad cover with red and pink triangles.

This is my favourite way to cast on these days. The long tail cast on is my ‘go to’ cast on but my cast on tension is generally tighter than my knitting tension. Originally developed by June Hemmons Hiatt, I use a variation of the Double Needle Cast On to consistently incorporate the right amount of spacing between my sts so my cast on edge is the same gauge (same width) as my knitting.

This is a video I posted on Instagram (click the image to play). I’ve referred students to this video so many times that I thought it should have its own spot on my website, so it’s easier to find.


View this post on Instagram


A post shared by Knitting Savant (@holliyeoh)

It’s that extra bit of yarn wrapping around the smaller, bottom needle that introduces just the right amount of space between my sts so they don’t draw in. It’s also a great stretchy cast on for socks and lace.

How to:

Use the needle size called for in your pattern (or whatever size you need to get gauge).

Set up the yarn in your hands and on the needle to cast on the way you usually do a long tail cast on. Generally you have the tail around your thumb and the yarn drawing from the ball around your index finger.

Step 1: Cast on one stitch normally. You should have your first stitch (slip knot or however you usually begin), plus one stitch, totaling two stitches on your needle.
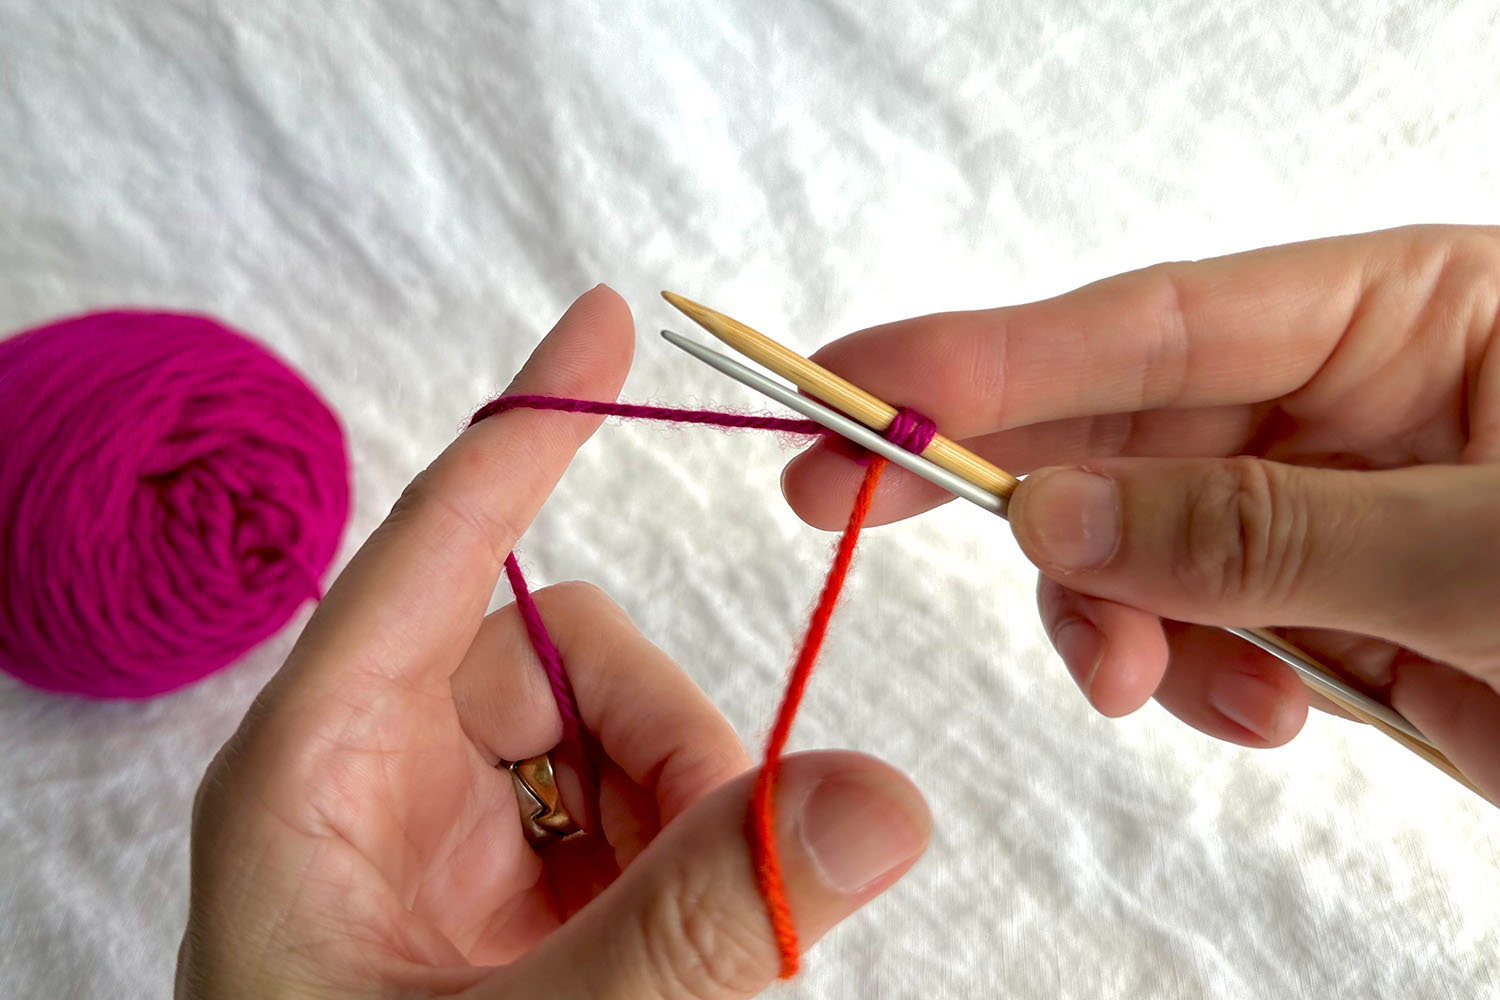
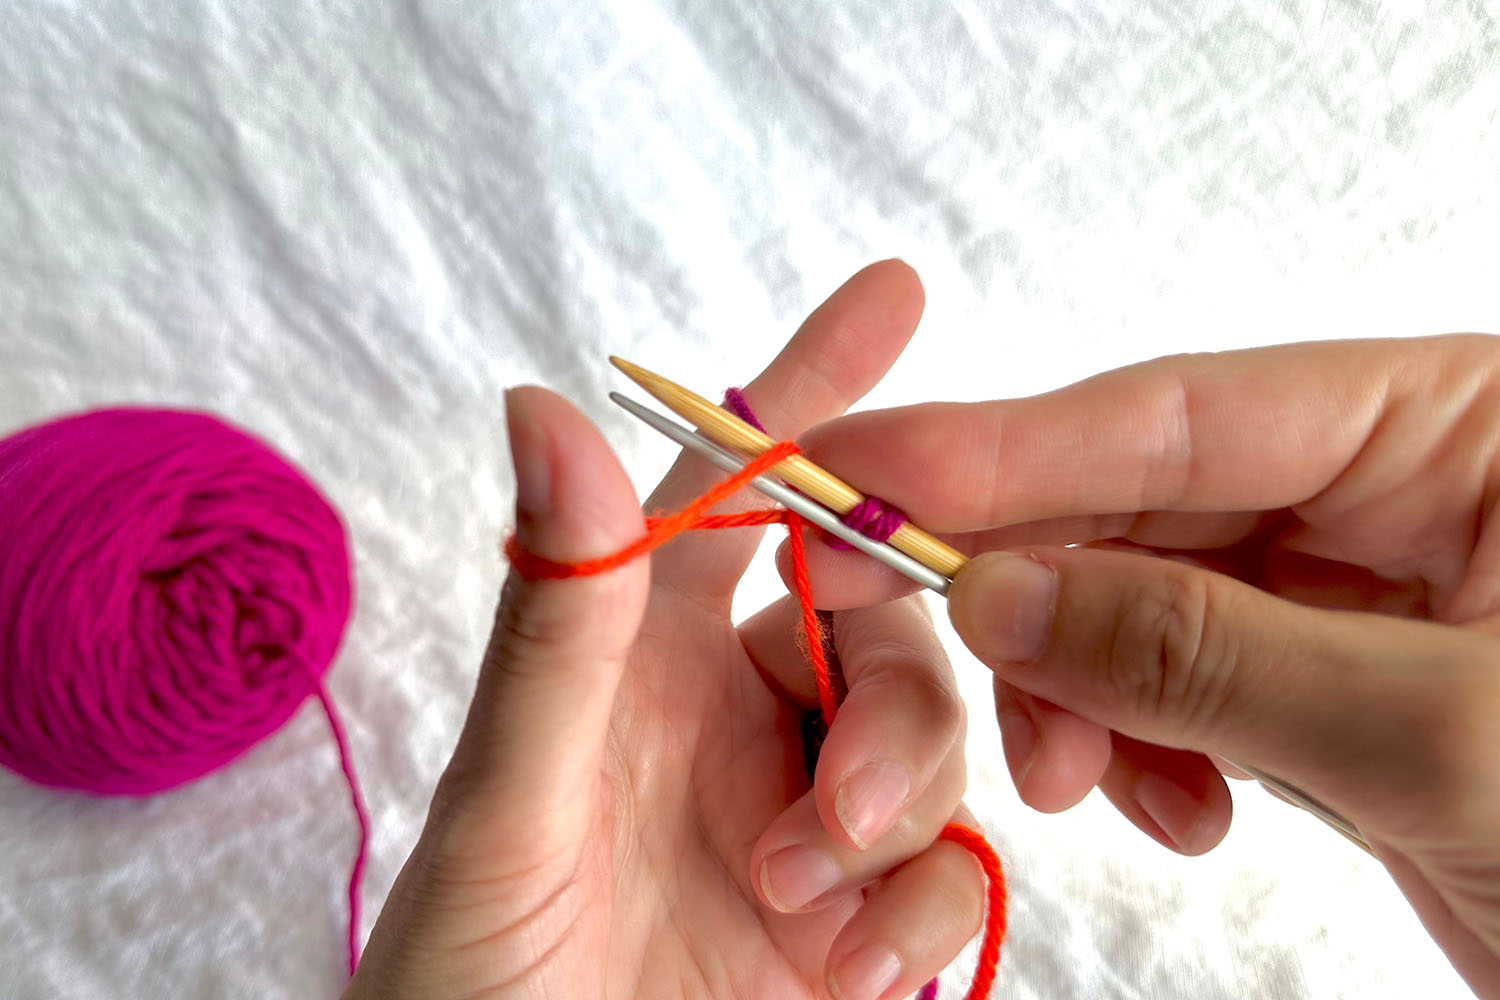
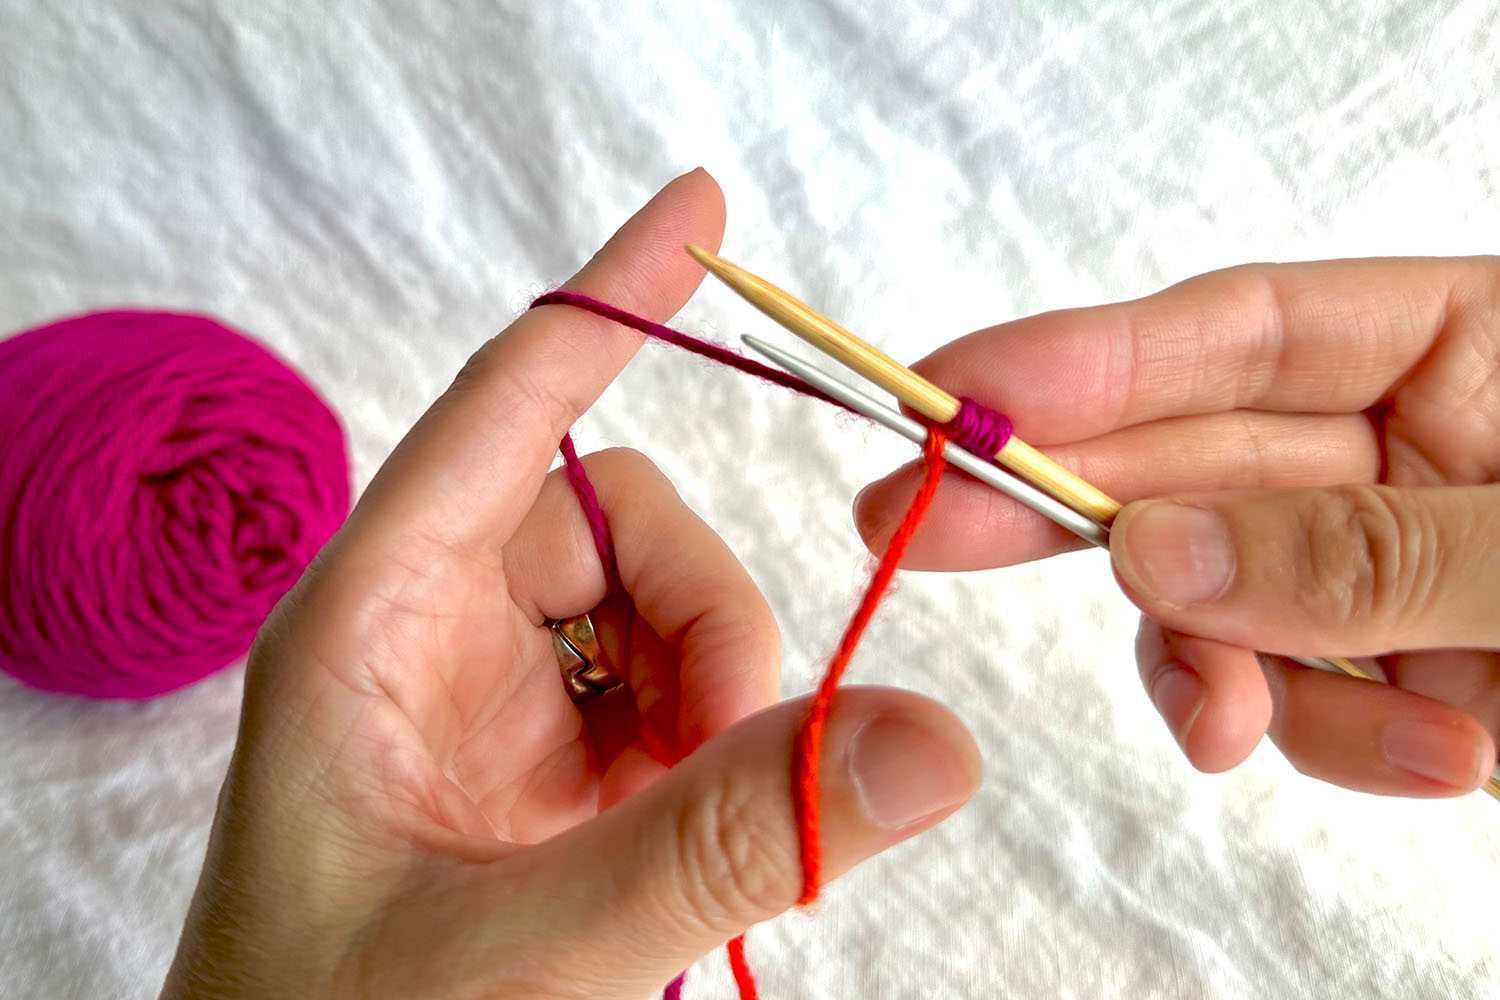
Setup for Double Needle Cast On; two stitches on gauge needle and a smaller needle held underneath gauge needle and in front of yarn.Step 2: Then hold a second, smaller needle parallel to and underneath your cast-on needle. Both strands of yarn should be behind this smaller needle.

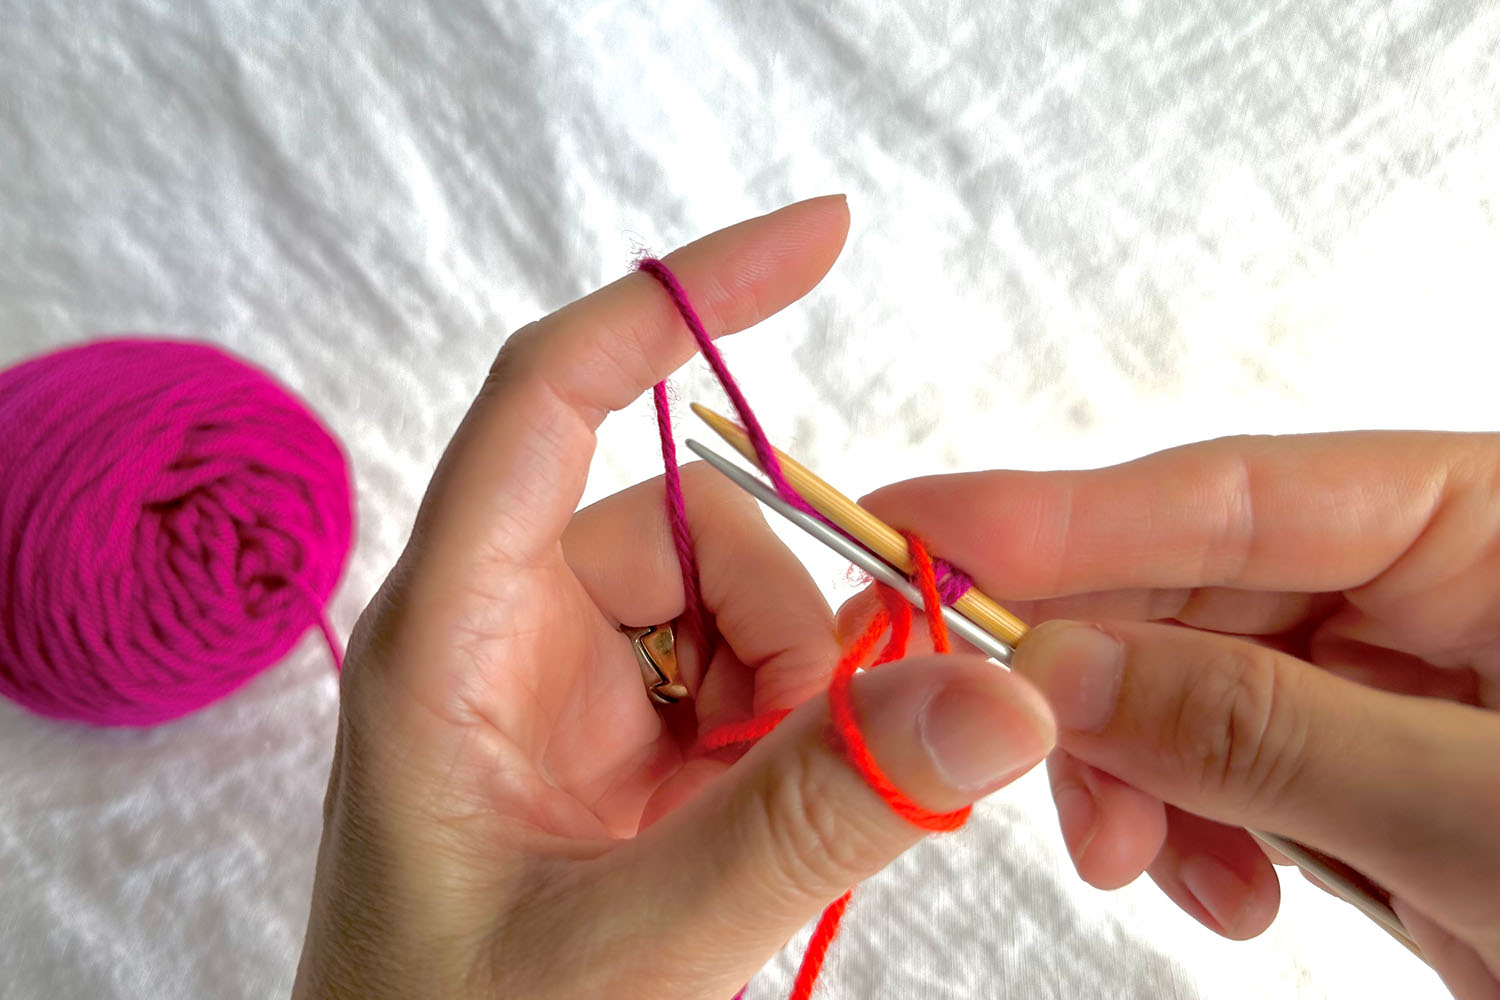
Both needles of Double Needle Cast On are inserted through thumb loop.Step 3: To cast on the next stitch, insert both needles together into the thumb loop in the usual fashion (for a long tail cast on).

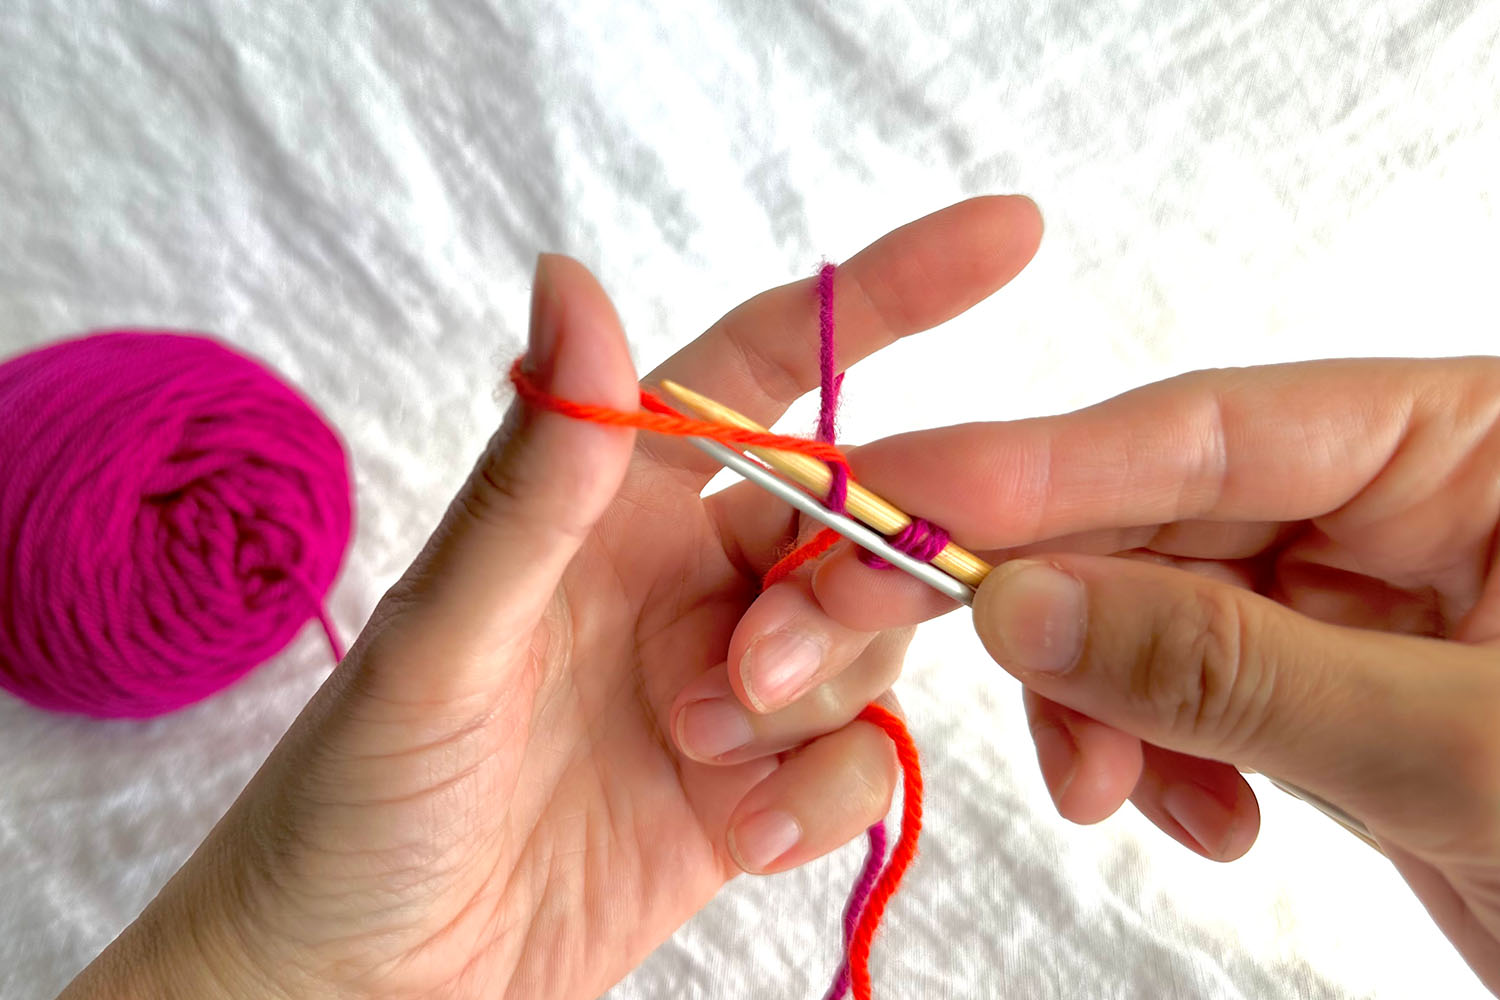
Near strand of finger yarn is wrapped around larger needle from back to front between the two needles.Step 4: Wrap the finger yarn around the top (larger) needle by sliding the yarn between the two needles from back to front, then over top of the larger needle.

Both needles are inserted through thumb loop.Step 5: Angle both needles together out of the thumb loop (the way you usually would for a long tail cast on).

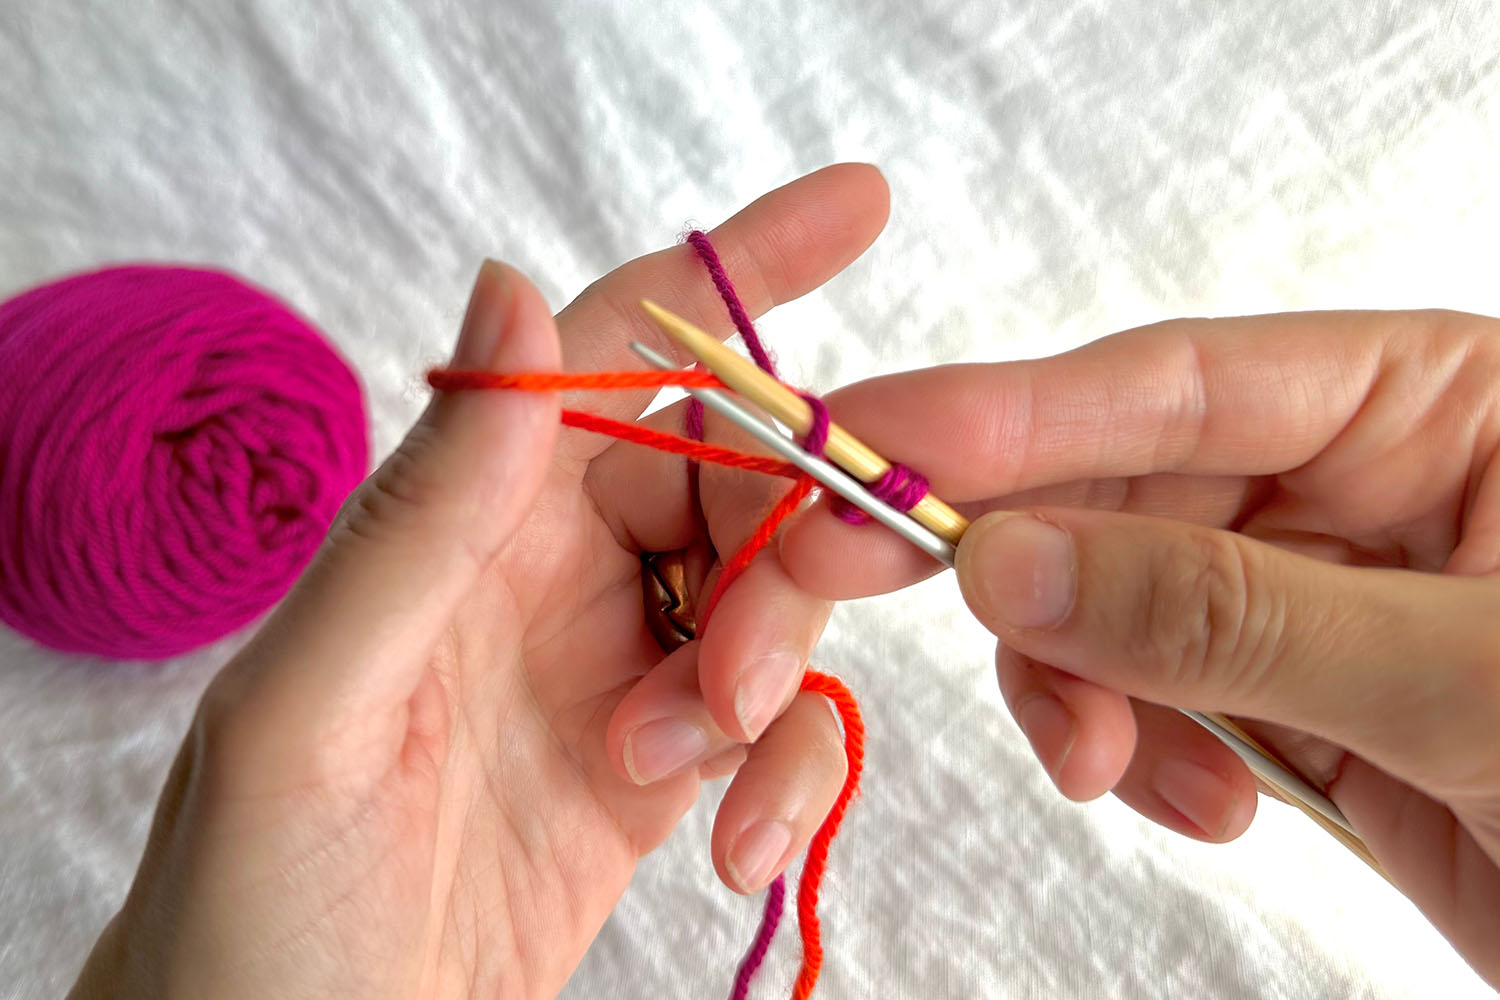
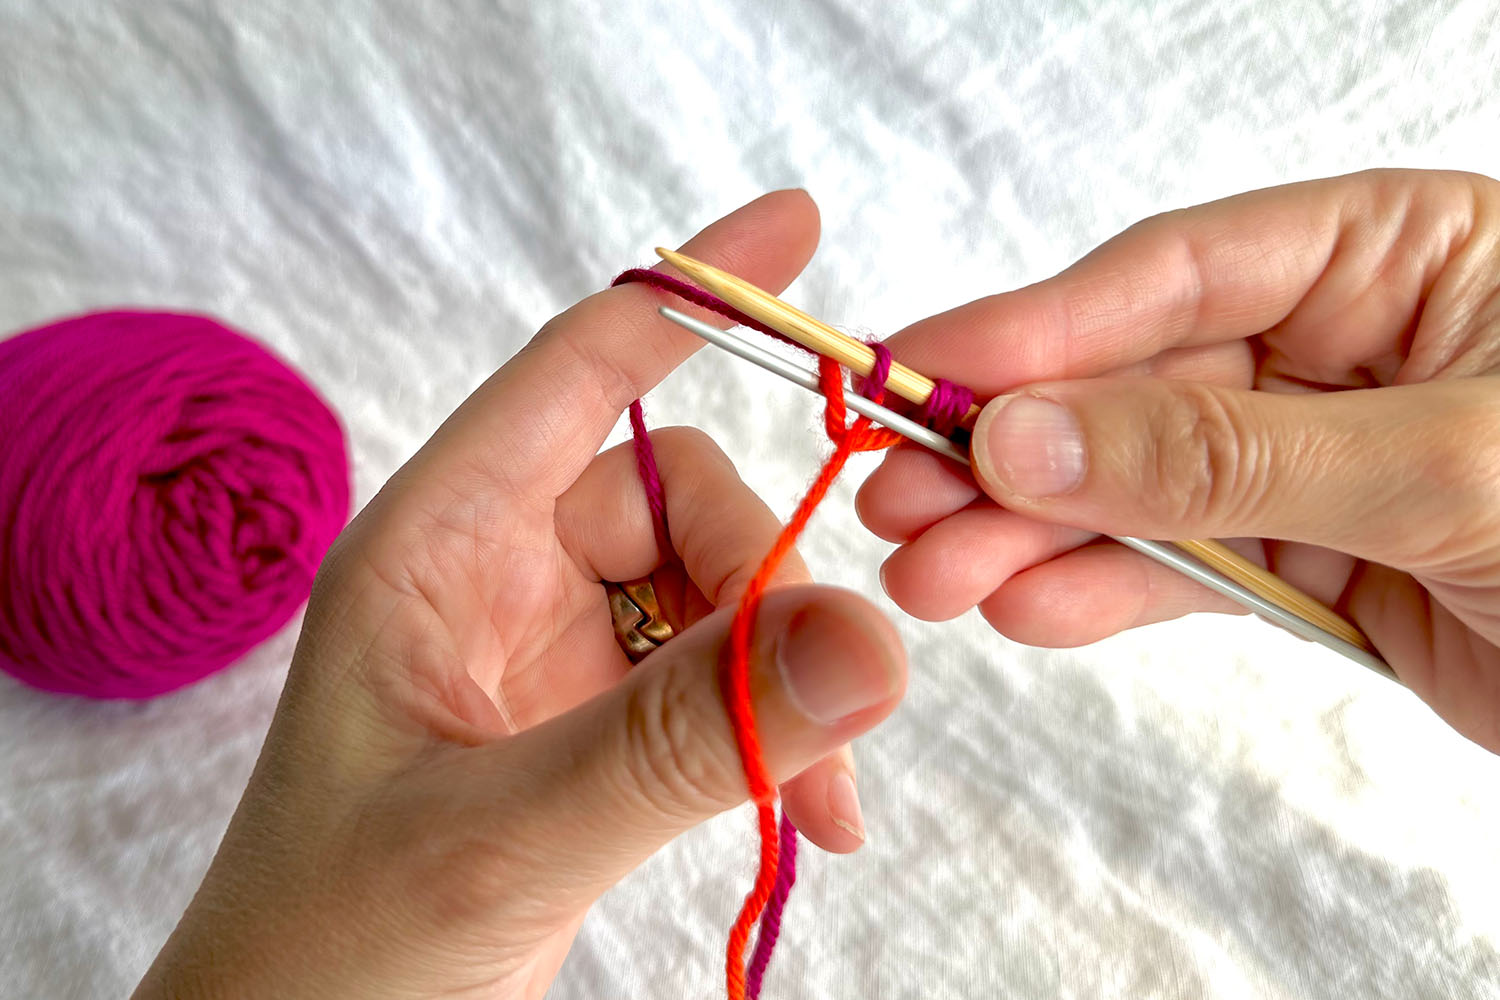
Near strand of thumb loop is brought between both needles and wrapped downwards around smaller needle.Step 6: Then bring the top strand of the thumb loop between the needles from back to front and down around the lower needle.

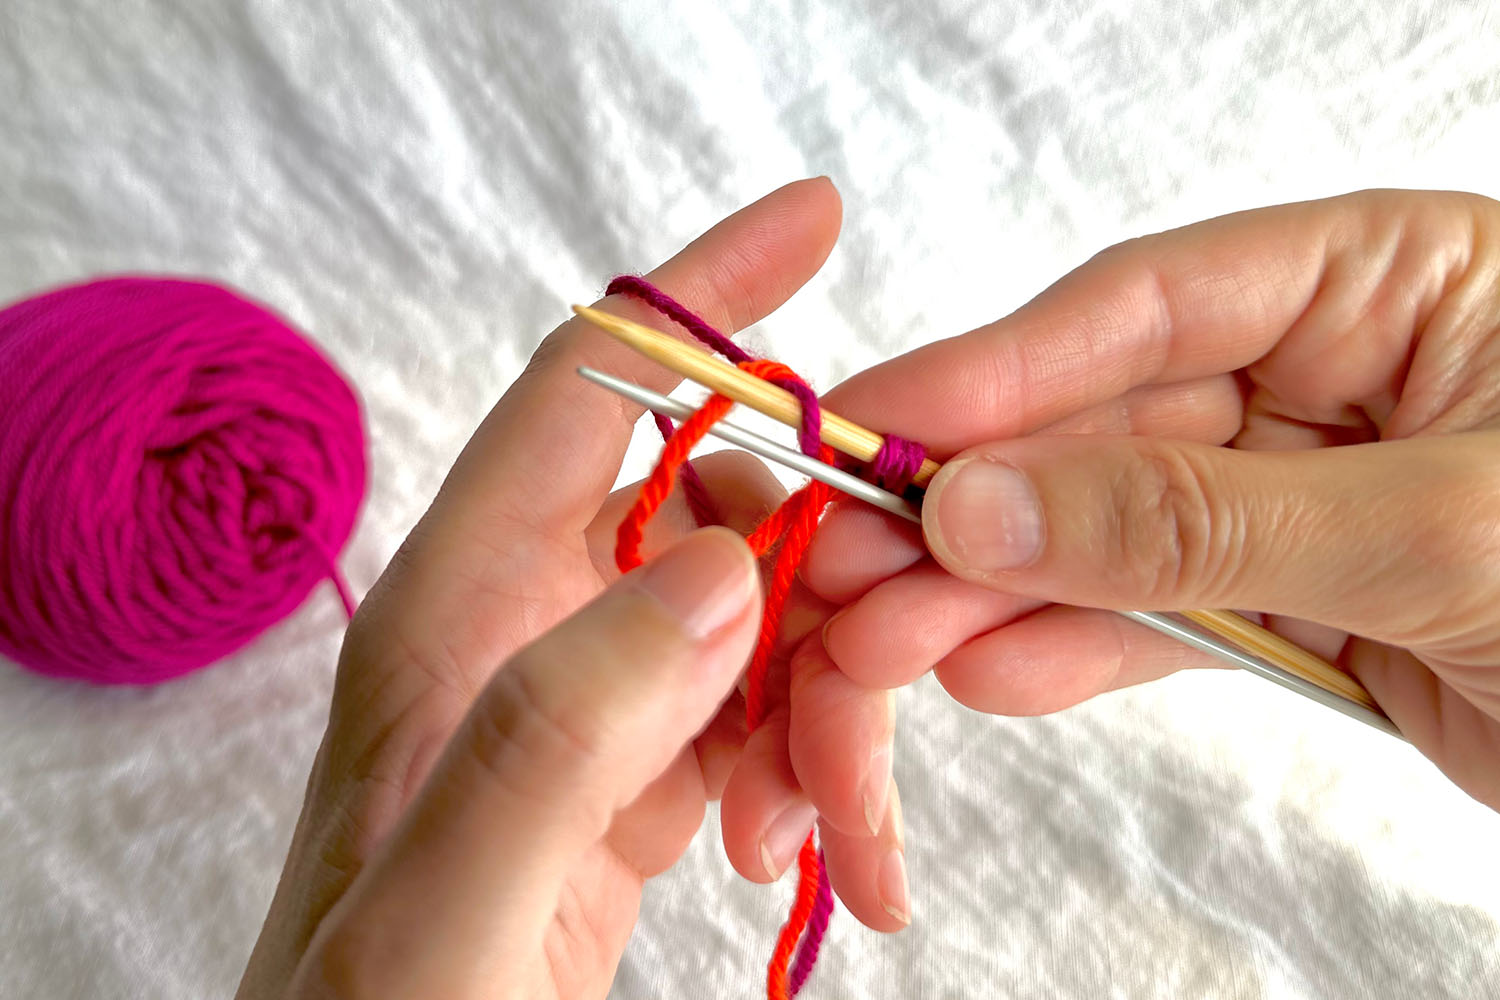
Thumb loop is dropped off thumb while maintaining yarn setup in rest of hand.Step 7: Drop your thumb out of the loop, …

Thumb is returned to its regular location in thumb loop and lower part of cast on is tightening around smaller needle.… reposition the thumb, and tighten up the thumb loop in the usual manner.

First Double Needle Cast On stitch is complete; 3 stitches on gauge needle and 1 stitch on smaller needle.
First Double Needle Cast On stitch complete. Note how tail yarn wraps around smaller needle. This wrap creates a consistently measured length of yarn between stitches.

Repeat Steps 3 to 7 to cast on as many sts as you need.
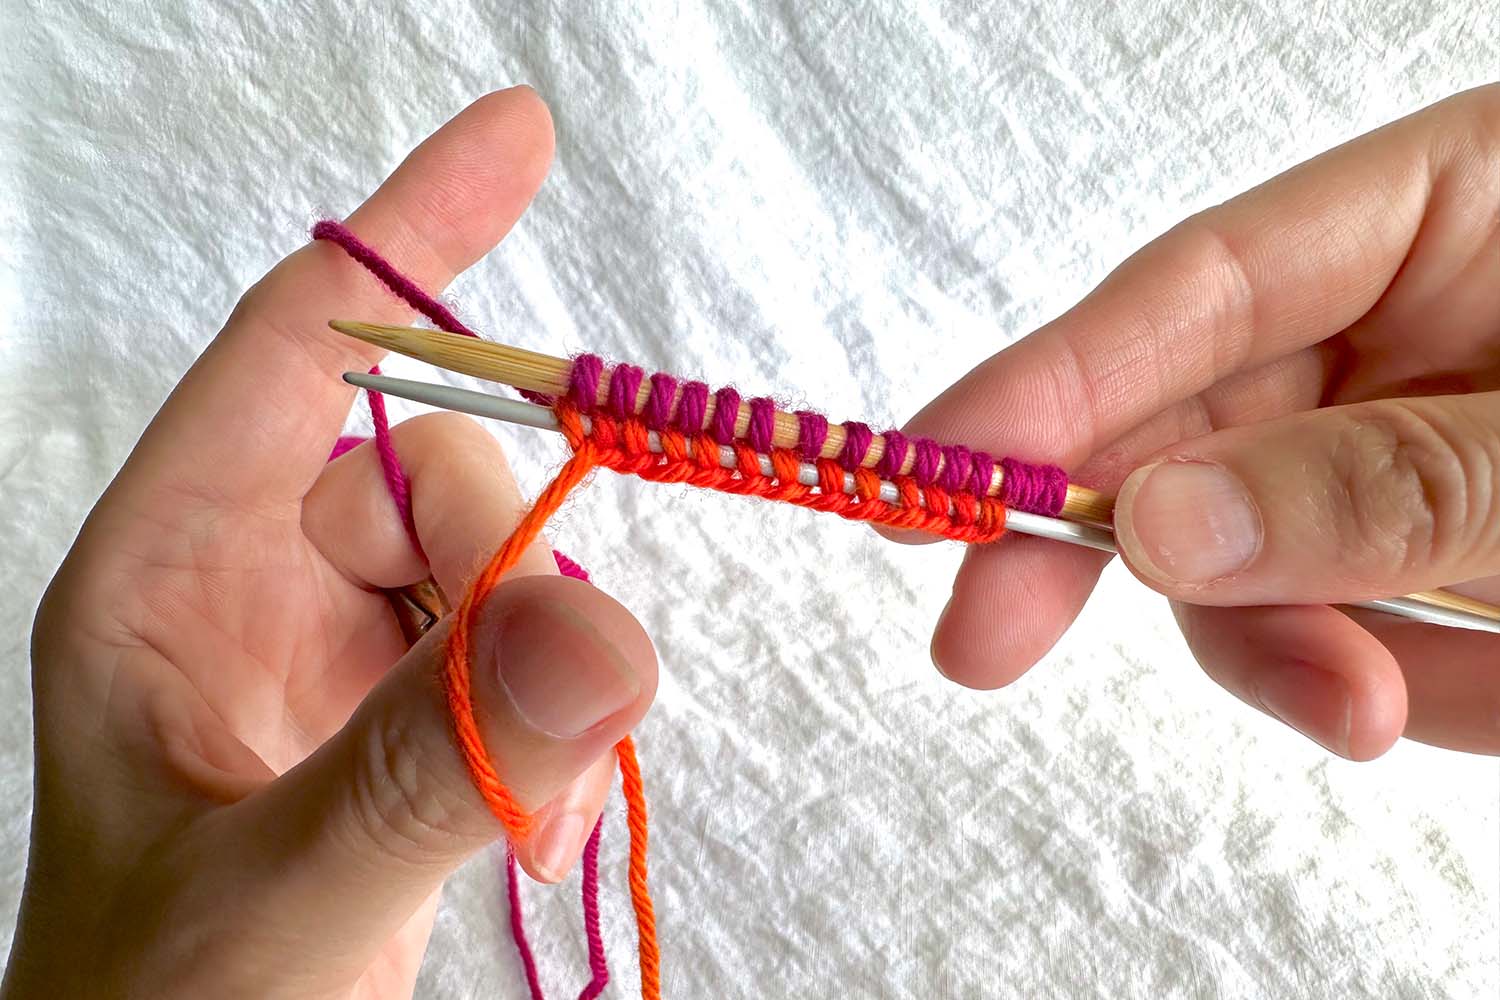
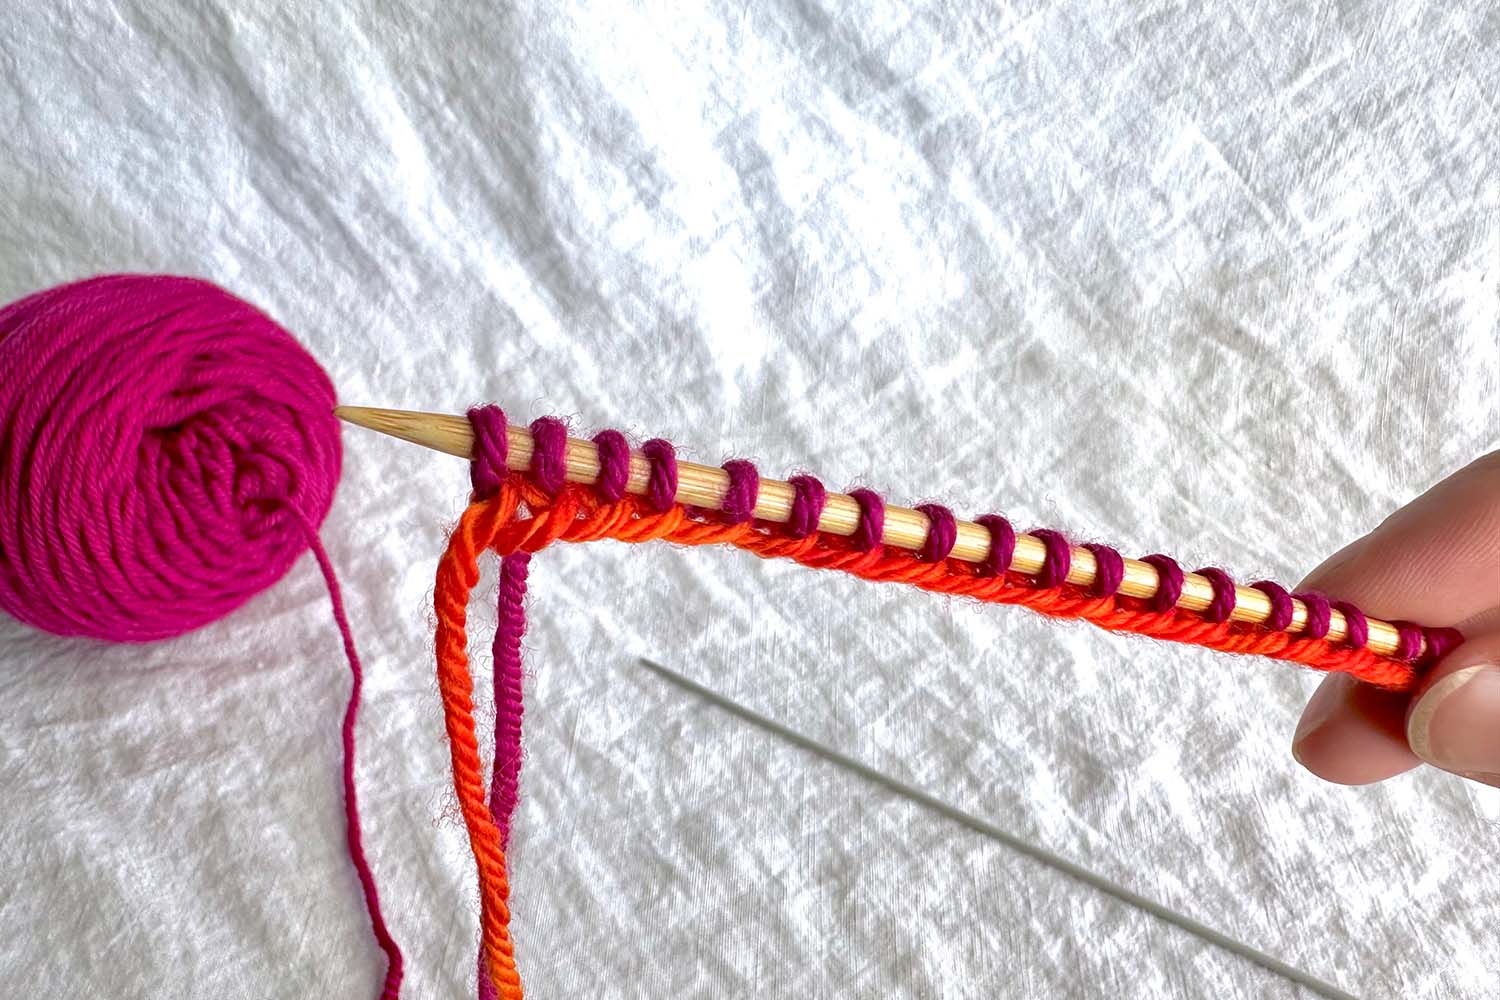
Several stitches cast onto larger (gauge) needle and bottom edge of cast on around smaller needle.
Finished cast on with smaller needle still holding foundation edge of cast on.
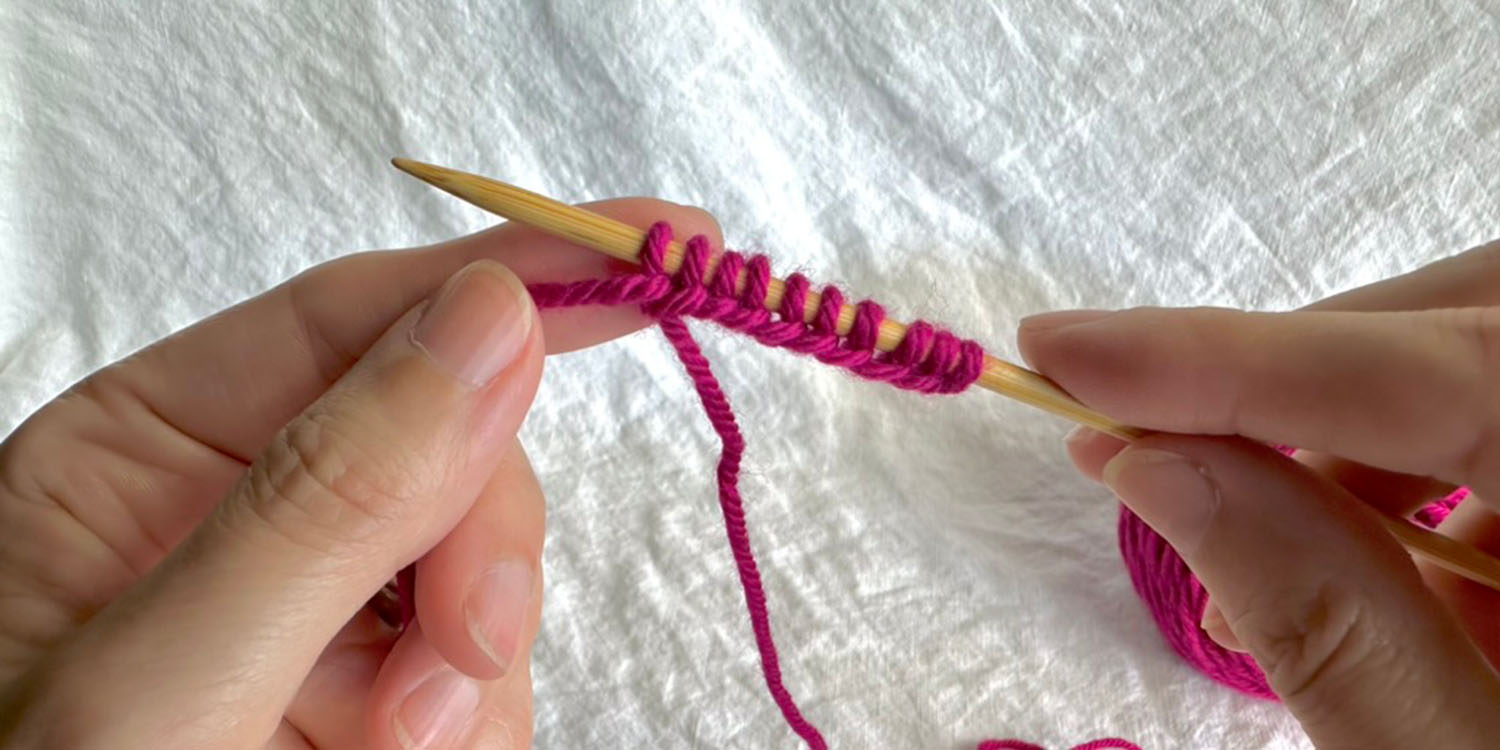
Finished cast on shows several stitches on needle and evenly spaced; second smaller needle has been removed from stitches and is sitting on table.
Right side of finished cast on with smaller needle removed. Note the neatly spaced stitches on the needle.

After you’ve cast on enough stitches, simply slide the smaller, bottom needle out and your cast on is complete.
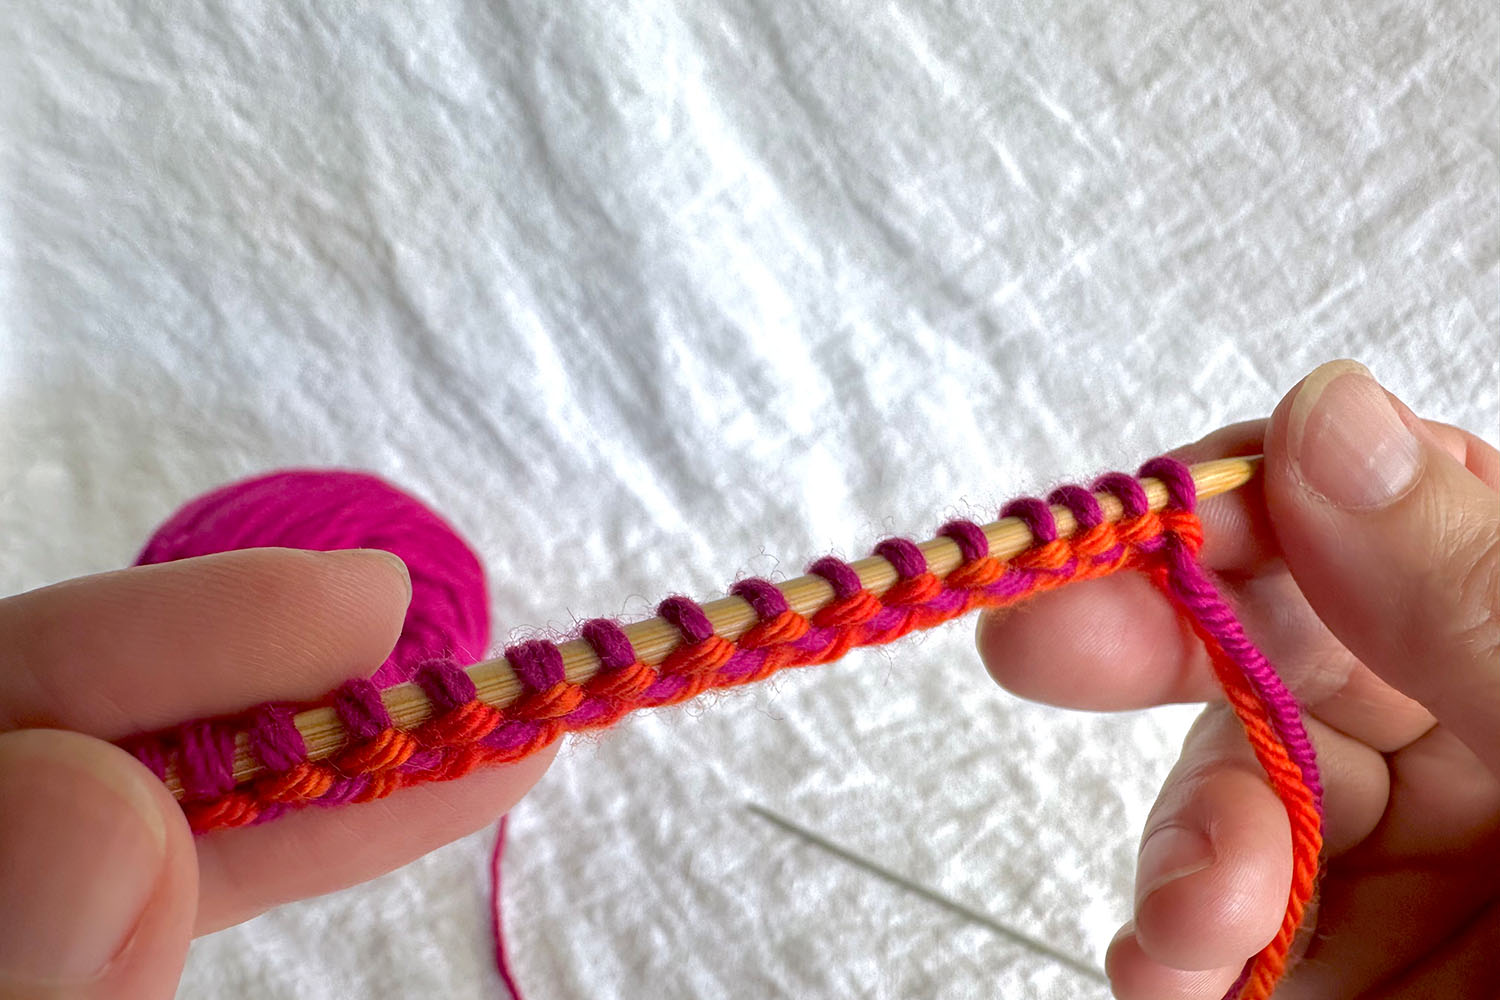
Wrong side of finished cast on shows several stitches on needle and evenly spaced and purl bumps of wrong side showing; second smaller needle has been removed from stitches and is sitting on table.
Wrong side of finished cast on.

This technique allows me to adjust my tension perfectly for every yarn weight by using different sized needles for the lower needle.

What Size Needle Should You Use For The Second Needle?

It will depend on your own personal tension but here are the sizes I usually start with for the different yarn weights. As always, swatching is your friend!

  • fingering >> 2 mm
  • sport >> 2.25-2.75mm
  • dk >> 2.75-3 mm
  • worsted & aran >> 3.25-3.5 mm
  • bulky >> 3.5 mm or larger